So far I have only ever knitted or crocheted using bulky yarns. I mean I’m a newbie after all. But, as I continue to explore the wonderful world of knitting, I have come across some truly beautiful – like absolutely breath taking – yarns. The colours are incredible! They are unfortunately often in thinner weights. So, obviously it was time to branch out and learn some new knitting skills and I was going to need some new yarn (and needles apparently).
I figured that since I had made several sweaters with bulky yarn, maybe a much smaller project with smaller yarn would be just as doable. From browsing around Ravelry, I noticed a rather interesting and very popular pattern called “Everything November Fingerless Mitts”. It is $4.99 (USD), and I always like to purchase patterns as they are nearly always excellent value for money. (It is a small thing, but it makes me feel like I’m contributing to the knitting ecosystem and supporting indie designers instead of just grabbing the freebies all the time.)
I went to Michael’s and bought some relatively inexpensive finger-weight yarn. I admit I was a bit shocked at how thin it was. Like string thickness. Would it really be possible to knit with this thread?
What’s a Comfort Zone Anyway?
So I downloaded my pattern and read the instructions. Turns out there are a few more things way outside of my comfort zone. Okay, a few things that I have no idea what they are. In for a penny, in for a pound as they say!
Very Small Things can be Scary
I knew that the required yarn would be thin so that is daunting but not exactly a surprise. However, the big new things for me are circular needles or optionally the Double-Pointed Needles (DPNs). I read the size required and figured there was a mistake. Nope. It is actually size 2.25mm (US 1). Eek. I had purchased an inexpensive set of bamboo needles a while ago so after searching through the package, I found there were actually DPN needles in there – size US1. They are exactly as expected too. Just miniature needles with points at either end instead of the knob at one end. Okay, looks like I’m gonna have to try it.
German Twisted Long Tail Cast On
In the past, the long tail cast on had been niggling at me. Casting on the large sweater convinced me to go back and really learn it. After re-starting a number of times, I did master the long tail cast on method for the men’s jacket I knitted. In the end, I don’t know why I thought it was so hard. But this was not just the long tail cast on – it was the “German Twisted Long Tail” Cast on. That was a little trickier, but once again YouTube and perseverance won out. The German Twist make the edge stretchy which is needed for these tight fitting mitts apparently. On to the next.
Tiny Double Pointed Needles (DPN)
Phew, two things down. Next up, the DPNs. Tiny little double-pointed needles (but doesn’t the yarn just slide off the other side?). Well, I was never going to understand the magic loop, so DPNs it is. As I said, I already had these needles, I just had no idea how to use them. So I jumped right in and cast on as instructed distributing the stitches across 3 needles.
Okay, newbie mistake: I had purchased a very dark navy colour for my experiment. The dark colour made it even more difficult to see the microscopic stitches. Luckily, a few months ago I had purchased one of those lights that hang around your neck (great purchase btw!). I was able to use it at the brightest setting and could make out those sweet puny little stitches. Kinda cute nestled in there.
Casting on with the DPNs

Finally on to the casting on with the German Twist. Slowly at first, I got into the swing of it and cast on the required stitches. I’ll not lie, it took a bit of finagling to get them distributed across the needles. Now to the pattern.
What I did not understand is that if you knit round and round, the result comes out as stocking stitch, not garter stitch. I think this is because you are really knitting around the outside of the circle so the right side of the knitting is always facing you. So, that is a bonus! I find the knit stitch much easier with a few easy purls to complete the pattern. Once I got a few rounds on the needles, handling became much easier. It took several hours (days), but eventually it started to grow.
I found the switching over to the next DPN a bit fiddly at first, but I had to remember to put the two needles together tightly at the juncture to avoid a stitch gap or ladder. It got easier as I went round and round and round…
Thumbs Up
The pattern instructions for forming the thumb were excellent and I understood easily. The execution was not my best though. To start with, I had to do both a make-one-right and make-one-left from a single stitch. The tiny pointy needles definitely helped with that, but I also used the tip of a tapestry needle to help find the right loop. There was a chart included with the instructions – which really helped keep track of things. My increases are still a bit dodgy, but I wanted to see how to complete the mitt so I soldiered on. At one point, I transferred the increased live thumb stitches onto a scrap piece of yarn and then completed the length of the mitts.
Once I finished to the top I used the Sewn Bind Off method – another first. This time though, this new-to me method was really easy to master and fast. Love it.

After completing the length of the mitts, I came back to the thumbs. This was actually quite fast and easy to pick up the yarn and complete the thumbs. Weaving in is still my nemesis, but I got it done. I was also able to fill in a few gaps left around the thumb and at my increases quite handily.
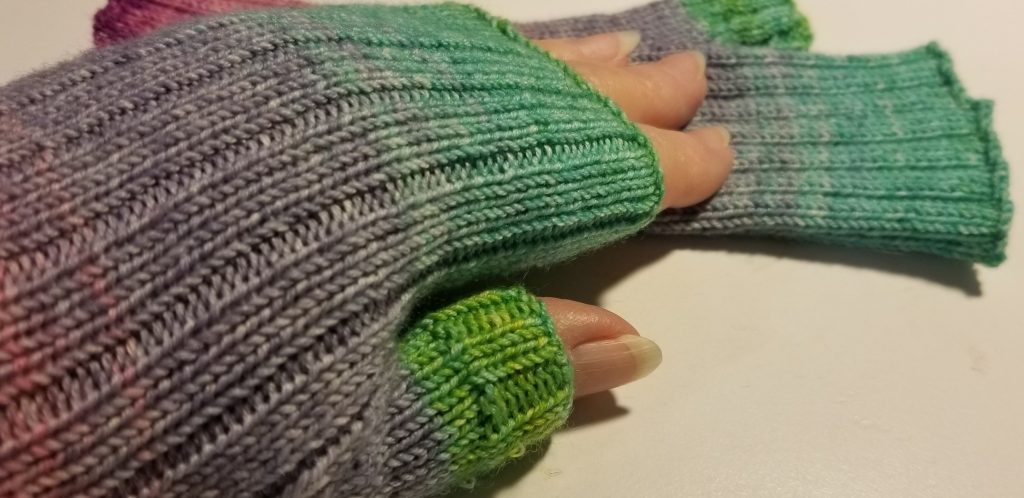
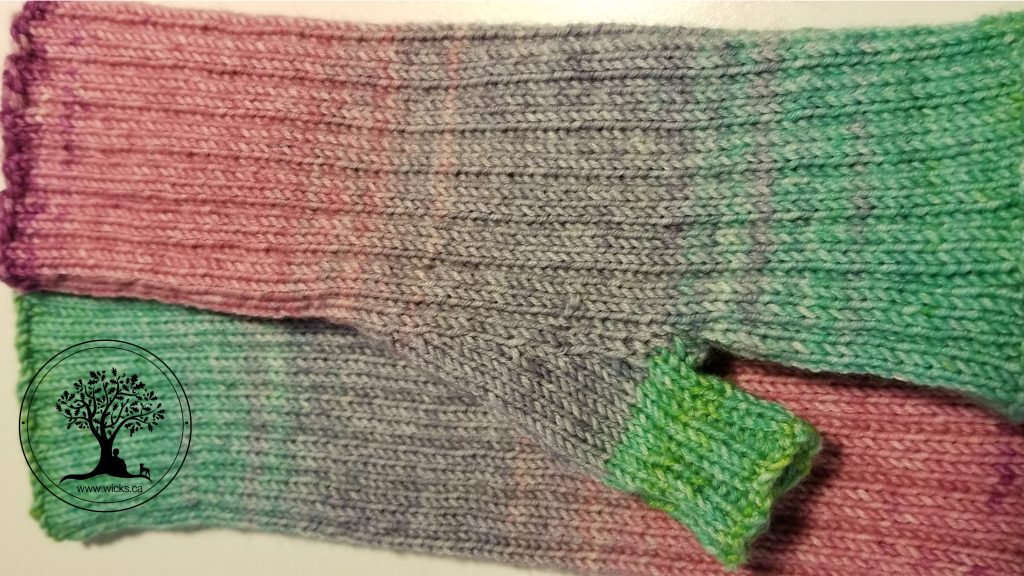
So, there they are: my first finished pair of Everything November finger-less mitts.
But wait. There’s more…
During Christmas celebrations, I showed my daughter-in-law the in progress mitts and she thought they were great. Even asked me for a pair. Coming right up! lol. I surprised even myself when I honestly said that I had enjoyed knitting with this thin yarn and tiny needles.
I couldn’t give her the pair I had already made as they were a bit scruffy with the mended holes and some missed stitches. Additionally, I was wanting to move away from the bamboo needles as I found them a bit sticky of the yarn. For my next pair, it was time to learn the magic loop.
The Magic Loop
After reading around, it seemed there was a consensus that Chiaogoo circular needles were the best. The interchangeable sets were a bit pricey and I was worried that steel ones might be too slippery for my fledgling skill level. As a compromise, I decided to purchase the 40″ 2.5 mm ones from a charming local yarn shop and see how it went. Yes, I went to an actual yarn store – walked right in and pretended to know what I was doing. It was obvious I didn’t though and had a lovely chat with the ladies in there.

So armed with my new needles, I had tried again to understand the magic loop method. However, for whatever reason, possibly armed with my DPN skill, I realized that it was just making sure that I was working on the outside of the circle with the right side of the knitting always facing me. Funny how I’d watched several videos and was still perplexed, when suddenly the penny dropped.
What I understood was how to get my needles lined up to knit. So I held them together with the cast on stitches divided evenly between the two needles. The yarn was on the top needle and the working needle went under the yarn and into the outside of the stitch. Each time I finished a row, I realigned the needles, positioned my yarn and continued.
A few times at the beginning, I forgot to move the working needle under the yarn and ended up with an additional loop at the end. When I realized it due to the pattern count, I just dropped the loop and carried on. Worked well. I made a second pair of mitts!
As I showed my daughter, she too wanted a pair…coming right up! (Well, not right up. It takes me about two weeks to make a pair and then they have to be sent to the UK). But I was on it.

This time I used the wool I had purchased from Yarns e’Well Love when I got my circular needles (Oh, didn’t I mention that I purchased some yarn too?). It is part of the Echos Collection by Gusto Wool (80% merino wool, 20% Nylon). Beautiful. The store spun the skeins into two balls for me and the colour pattern came out almost identically for each mitt. Quite fancy eh?

A couple of things I learned
I learned to keep my sewn cast off stitches tight. The kept them looking much neater. I got better at the make-one increases with practice, but I also employed the LIFTED increases to avoid holes even better. I stopped agonizing over my tension and just let it flow. Also, so many little things can be fixed afterwards weaving in (around the thumb joint for instance).

Since making these mitts, I’m surprised how often I see someone on TV wearing a pair of fingerless mitts – human beings of all genders. I am now making a pair for son. Where will it end I wonder?? lol
I hope you enjoyed reading about my adventure and hopefully you will be inspired to make your own Everything November Fingerless Mitts. The pattern by Jen Yard is available on Ravelry or at her etsy shop. I highly recommend.
[…] have been using my wonderful Chiaogoo circular needles for a while now, but I use the magic loop method rather than a full circular […]