Make an Easter Basket with Reverse Appliqué
Basket and Appliqué Combo Project
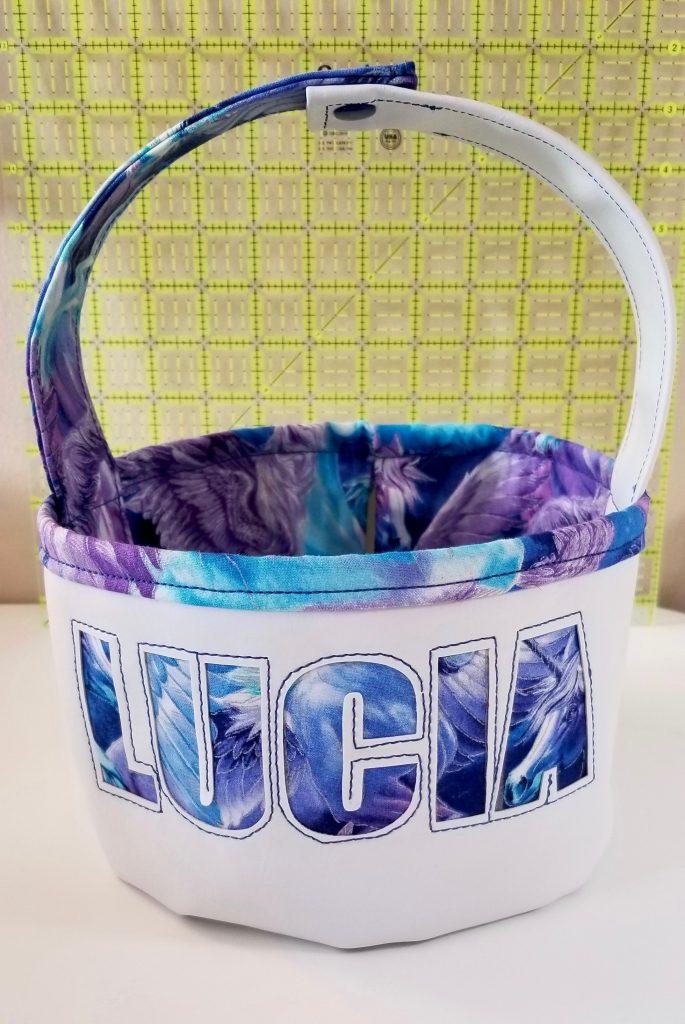
This project is a cute Easter or toy basket and includes a bonus tutorial on a reverse appliqué method in vinyl. This reusable (i.e., refillable!) basket is something that even very young kids will have fun with and love receiving filled with treats.
Sewing appliqué is a way of adding interest to your creations. Straight appliqué is where one piece of fabric is sewn on top of another larger piece. Reverse appliqué is where a shape is cut in one piece of fabric and another piece behind it shows through the hole. There are various methods of keeping the two pieces together, but it is usually some kind of stitching – machine or by hand. This tutorial uses a sewing machine for stitching and a Cricut cutting machine for cutting the “hole” or this case letters.
Two for one
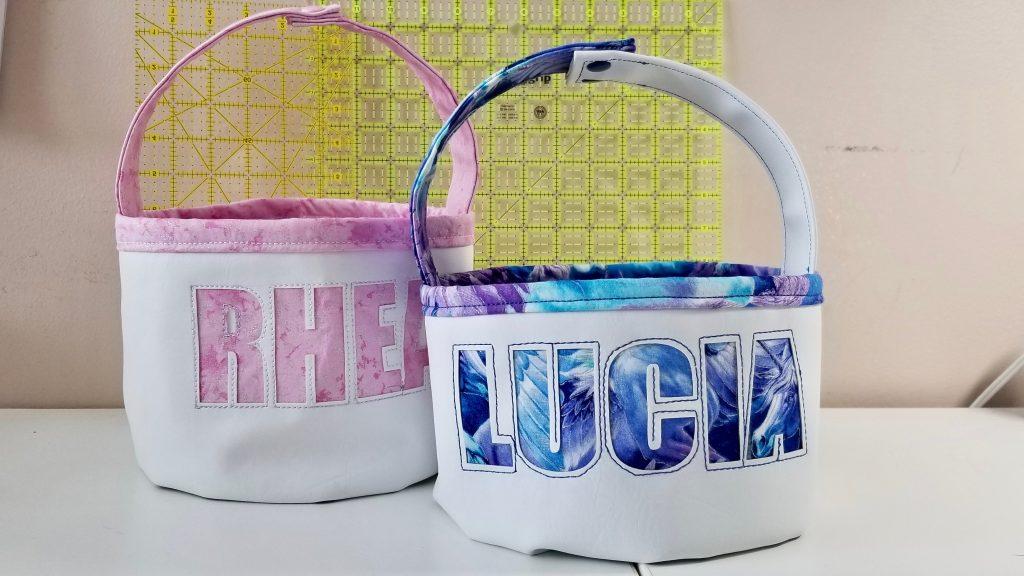
This project can be separated into two parts – the Appliqué and the Basket. If you just want to make the basket, skip down here. If you would like to see the finished baskets, I have a few images here. Otherwise, let’s prepare the appliqué first on the outside main vinyl fabric.
Supplies Needed:
- Appliqué:
- Cricut or other cutting machine with long (24″) cutting mat
- Painter’s tape
- Double-sided tape
- Coordinating or contrasting thread
- dull pencil & ruler
- seam ripper (dull)
- Sewing machine
- Fabric pieces cut for Basket
- Optional:
- Fray check
- small craft knife
- Basket:
- Light Vinyl for main fabric (I used 24 oz.) (1/2 yard)
- Coordinating cotton for lining (1/2 yard)
- Coordinating or contrasting thread
- Strap:
- KamSnaps or velcro (if joining two straps)
- Medium-weight woven fusible interfacing
Appliqué
Step 1 – Cutting Out The Words with Cricut
I used my Cricut maker, but any cutter will work here. Chunky capital letters will be the easiest to work with and outline with stitching. For that reason, I selected the font “Impact” from within Cricut Design space. The total width of the name I made was about 7 inches wide by just over 2 inches high. This may vary for you depending on the number of letters in the name you are cutting and the font choices you make.
Once you have the name or word how you like to cut, grab your vinyl and 24″ cutting mat. You will use the main fabric piece cut for your basket at 25″ x 7″. The name is going to go along the long side so you need to rotate your letters 90° before printing. You also need to calculate how far from the end to start cutting.


So I wanted the name to be in the centre of the front of the basket. For this I calculated that I needed to start the cutting in about 9 inches in. (Width of the vinyl (25″) minus the width of the name (7″) and divided the remaining space by 2 to equal 9″). I also positioned it slightly above the horizontal center point so the name was closer to the top of the bag. Use the grid on the cutting setup screen to verify the position on the mat.
Also in the cutting setup screen dialogue of Cricut Design Space, you will need to select your 24″ inch cutting mat. Your actual vinyl will stick out of the end of the mat by about an inch, but that doesn’t cause a problem.
For cutting, I selected faux leather (thin) as the material and added “more” pressure with one pass. I used a fine-point blade.
It is absolutely essential to fasten your vinyl to the cutting mat on both sides and at the top with painter’s tape. It will be a jumbled mess otherwise :-(. Yes, I do know that for sure.
Step 2 – Lining Fabric Placement
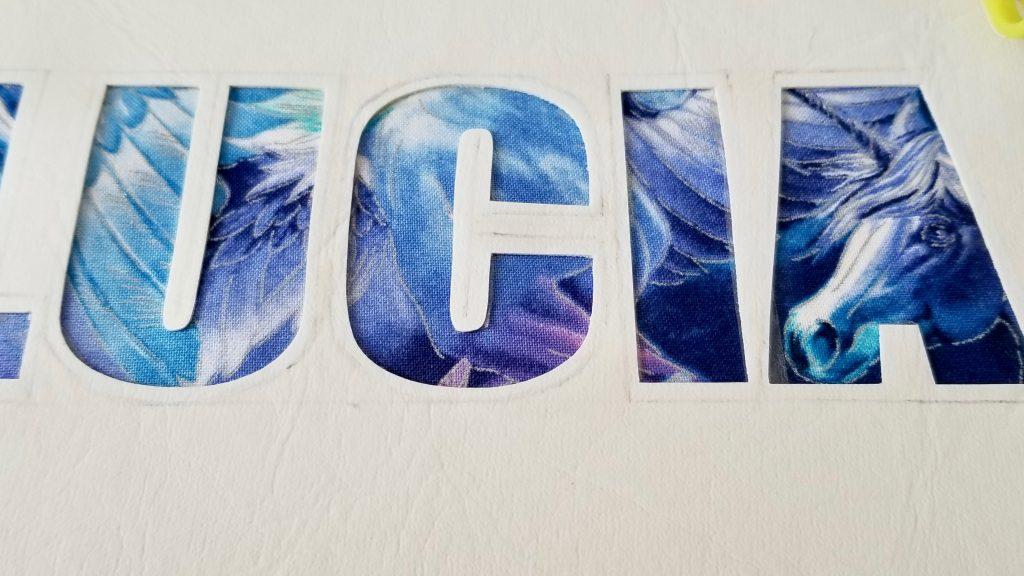
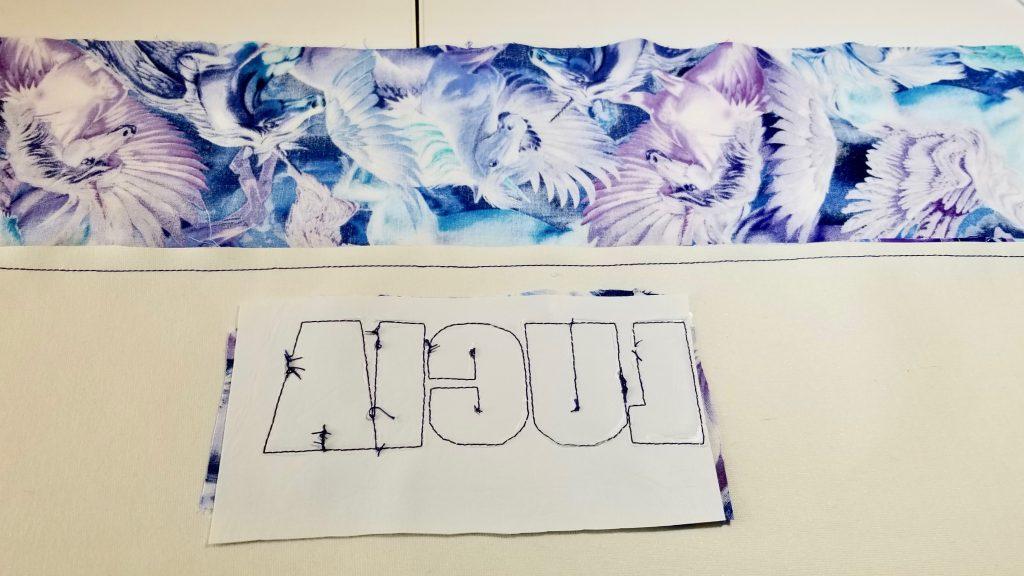
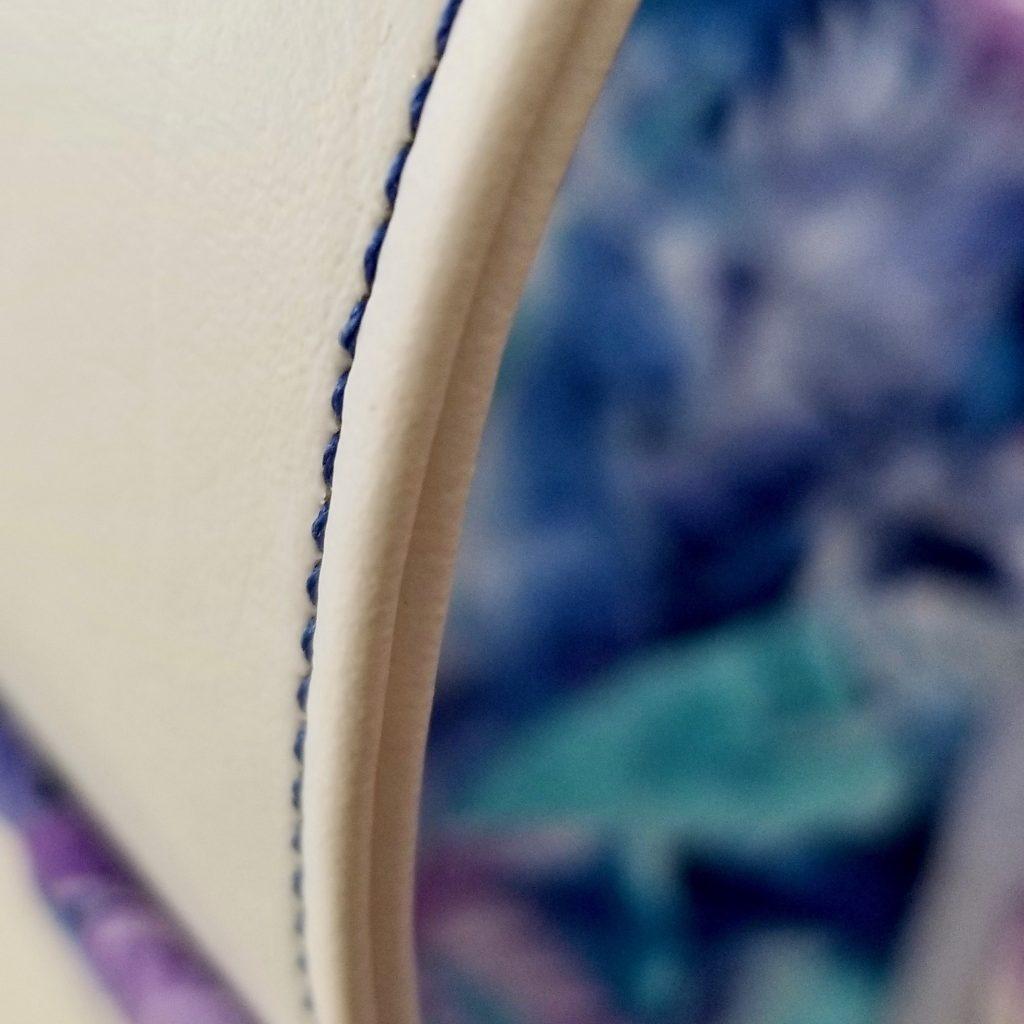
Okay, so you should have your vinyl prepared and cut with the letters removed. First, lay the hollow letters on top of your backing fabric. This will likely be the same as your lining fabric or another fabric of your choosing. First look for the best placement. If there is a pattern, notice what part of the pattern shows through. In the case below, the unicorn’s head fit nicely into the “A”, so just move the fabric around until you find what looks good.
Step 3 – Design the Stitch Lines
Next up is to decide exactly where you want your stitch lines to go and to pencil in light lines. Don’t use a sharp pencil or thin lead – you don’t want to pierce the vinyl! Use a ruler to draw a straight line across all the letters at the top and bottoms first estimating the distance equally from the letters. I left a space of about 1/16th of an inch. This step insures your lines are straight across the top and bottom. If you skip this step, it will be almost impossible to find the turning points consistently across the letters. After drawing in your lines, erase the parts you don’t want to stitch, like between the letters.
You will also be able to identify your problem areas. In this case, I noticed the bottom of the “I” and the “A” in Lucia were very close, so I had to decide how to stitch it there. Also, I had to decide how to outline the inside of the “C”. I went with one line down the middle of the U.

Finally, decide if you want to remove the inner parts of the letters. For the blue one, I left the “A” full so that the face of the unicorn was showing. In other cases (like the R in the design to the left.) I removed the middle with a craft knife using my cutout as a guide. I pressed the craft knife around the void over a self-healing cutting mat. Start small and widen as necessary. You could also finish the edges with small sharp scissors. I then placed a scrap piece of vinyl behind that hole to complete the design.
Step 4 – Apply the Double-sided Tape
Turn the vinyl so wrong side is up and grab your double sided tape. I used 1/4″ tape. Getting as close as possible to the edges, cover all edges of every letter with double sided tape. Be generous, get in the little areas and ensure complete coverage. Cut small pieces of tape to fill in any gaps you should have complete coverage here. When all the areas are completely taped up, remove the other side of the tape, turn the vinyl around and place on top of your fabric, in the placement you decided on earlier. Press down to adhere. If you need a third layer for the voids in some letters (like the ‘R’), turn over again, and repeat the process. Tape entirely around the shape, remove the tape backing, press on your vinyl scrap. Now we are ready to sew.
Step 5 – Now We Sew
I found that about 3 was a good stitch length, but you should always do a test first based on the thickness of your fabrics and best stitch length. I test it out for each new project. Since I use a Juki TL-2010Q I don’t have trouble with the thicknesses, but I always test because I may need to adjust tension or foot pressure to get a good stitch. I found the best thickness for me was to add another layer of vinyl on the back behind the cotton in this case.
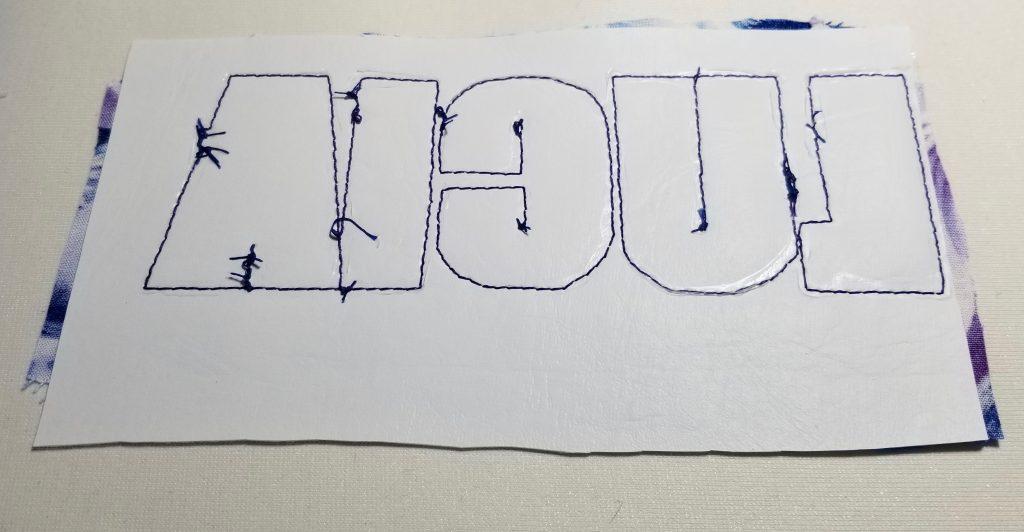
Start with a long thread tail in the needle. For each letter, start halfway along a straight line rather than the top or bottom of the letter. Since I will be putting the last stitch into the first one, starting on the side is the easiest way to do that without also trying to navigate around a turn or curve. Slowly follow your pencil lines. At each turn, stop, hand crank your needle all the way down and then just a tiny amount back up to ensure it catches the bobbin thread. With the needle still in the fabric, turn and continue. This should ensure the thread stays on the 90 degree point.
When you have gone all round the letter, carefully position the last stitch to go into the first stitch. Don’t use the thread cutter if your machine has one. Instead, raise the foot and draw out the threads and cut both threads with a long tails.
Continue with the rest of the letters the same way. Hand crank until the needle begins to rise at the corners, put the last stitch into the first stitch and leave long threads. For the single lines (like the middle of the ‘U’), start in the line at the top directly in the top row of stitches. Do not backstitch!

You will end up with this mess. Don’t worry – I have a plan.
Step 6 – Tying Off the Threads
Since we didn’t want the design to be marked up with back-stitching, we need to prevent your stitches from unraveling another way. To do this, I pulled each of those threads to the back to tie them off and secure them. I set up in front of the TV with a show on in the background, but a good podcast will do nicely too (I recommend Skeptics Guide to the Universe if you like science).
I grabbed my dull seam ripper and small sharp scissors. Working from the back, slowly and carefully wiggle the thread hanging out at the end points until you can slide your seam ripper into the loop. If you grabbed the right loop, you should be able to pull the thread through. It takes a bit of practice, but it get easier as you go on. Continue until all threads are pulled out to the back.

Step 7 – Sealing the Threads
At this point, you should examine your work from the front. At one point, I had pulled the wrong thread and undid a stitch. I used a needle to redo the stitch in the same hole and then pulled back the thread. This is not nearly as hard as I thought it might be and is actually very satisfying to be able to fine tune a bit here and there. I noticed I went off with one stitch at the bottom of the ‘C’, but if I adjusted it the hole would be still noticeable, so not a good fix. In the end, I left it as it was and now there are just the right amount of flaws to prove I made it myself! lol
Grab the dangling thread in pairs and tie in knots. If you left a long tail, this should be quite easy if a bit fiddly. I tend to overdo it and did about 4 knots at each joint. You decide – more or less. When done tying, cut off the remaining thread. Seal all the knots with fray check and you can even apply it in a single line on top of each the thread lines on the back. Finally, trim and square off the excess fabric from the top and sides extending past your design. Careful to stagger the edges though, or there will be a noticeable dent from the front.

Back on the front, check if any of the pencil markings are visible. Lightly erase or wipe. Now we are ready to make the basket.
Making The Easter Basket
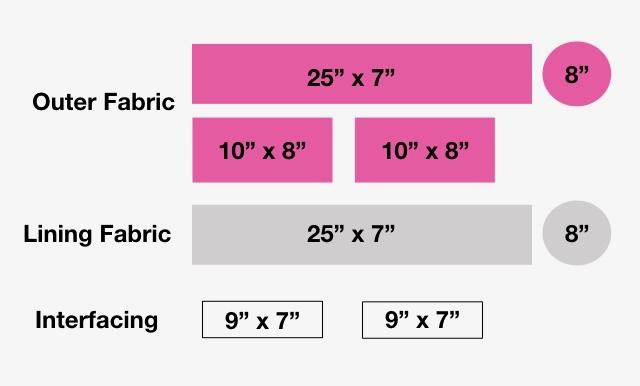
This is a simple lined basket with a round bottom. My finished basket is just under 8″ wide (diameter) and 6″ tall. For this size, you will need to cut your pieces as below.
Note 1: If you want to use all cotton to make this basket with the appliqué, you should fuse at least a medium weight fusible interfacing such as Pellon 808 Craftfuse to the lining and/or outer fabric.
Note 2: If you want to make one single continuous strap instead of the two that connect, cut one piece at 21″ x 8″ instead of the two 10″ x 8″ pieces and one interfacing piece at 18″ x 7″.
Instructions for Basket
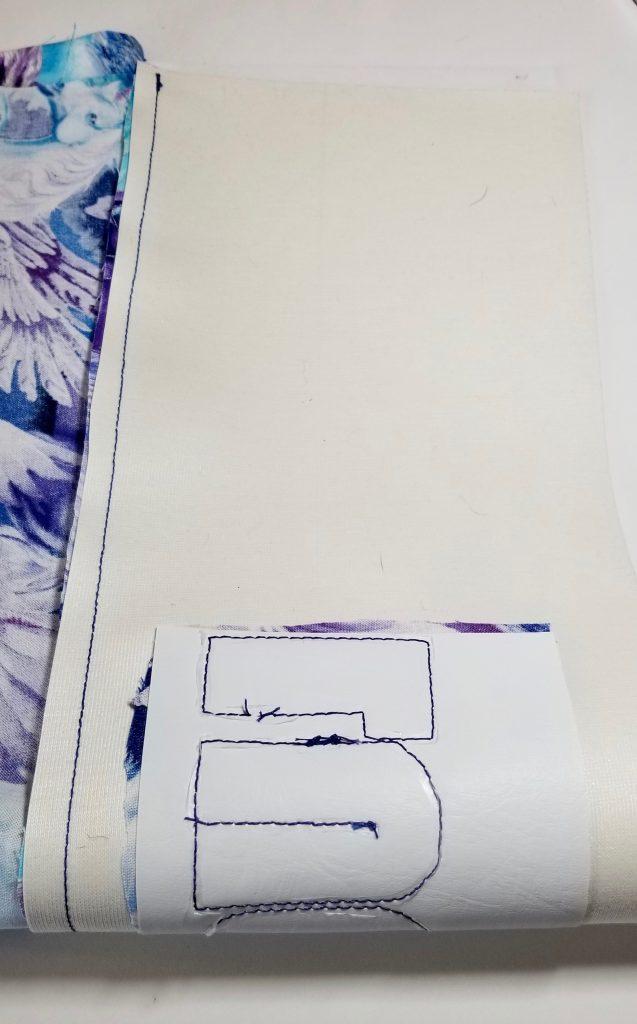
Step 1 – Sew Together Lining and Main Fabric
With right sides together, sew the lining and outer fabric together along one long side. This will be the top of the basket, so if you are using a fabric for either the lining or main with a directional pattern, ensure it is right side up. Also, if you added an appliqué name, ensure that it will be right side up. That means the top of the letters will be up towards the seam line for the outer fabric. The top of the lining fabric will also be towards the seam line. Use a 1/2″ seam allowance.
Step 2 – Sew Side Seam
Bring together the two short ends and line up the lining with the lining and the main fabric with the main – right sides together. The seam you just created should also line up. Sew along this line leaving a 3-4 inch gap on the lining side (for turning).


You will end up with a cylinder that is open at both ends.
Step 3 – Sew on Bottom
Attach the bottom circles onto each end. Mark the quarter points on the circle and on the round open end. Line up the circle to the bottom right sides together. The circle will sink into the cylinder end slightly. Carefully stitch around the circle. Repeat for the other end with the vinyl.
Step 4 – Turn Right Side Out
Push the lining and the main fabric through the gap you left in the lining to turn the basket right side out. Once turned completely, push the lining into the basket. Turn the top over along the top edge to create a cuff along the top to the depth you like. Smooth and clip in place.
Step 5 – Make the Handle Straps
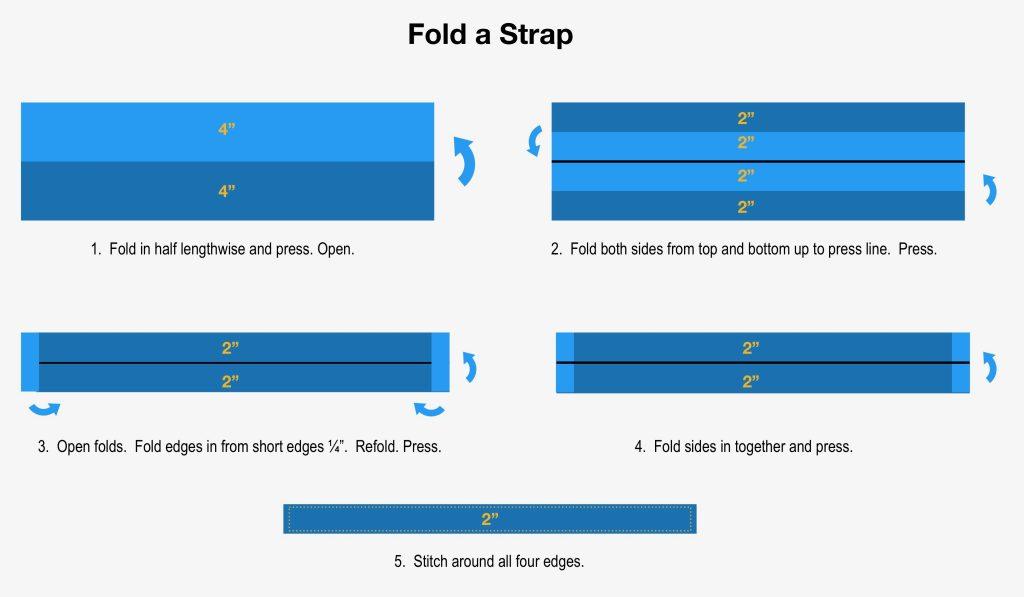
If using cotton for the straps, first center the interfacing onto the strap pieces and fuse. Fold in half lengthwise and press. Fold each side into the centre and press. For all four ends, fold in 1/4 inch and press. Refold sides so the raw edges are all enclosed. Fold both sides together into middle and press. If using vinyl, apply double-sided tape along the length down the centre. Fold up sides to centre and fold ends in. Fold entire strap in half. Clip to hold.
Stitch around all four both sides of the handle pieces starting with the open side. You will have 2 straps about 6 1/2″ long by 2″ wide.
Step 6 – Attach the Handle
Place each handle inside the basket and line up to the sides directly across from each other. Any embellishments you added should be centered in front and the seam of the bag should be centered at the back.
You can place the straps all the way to the bottom of the basket or floating up a bit depending on how long you want the handles to extend up. They should overlap each other at the top by at least one or two inches. Clip in place on the sides.
Step 7 – Finish Top and Sides
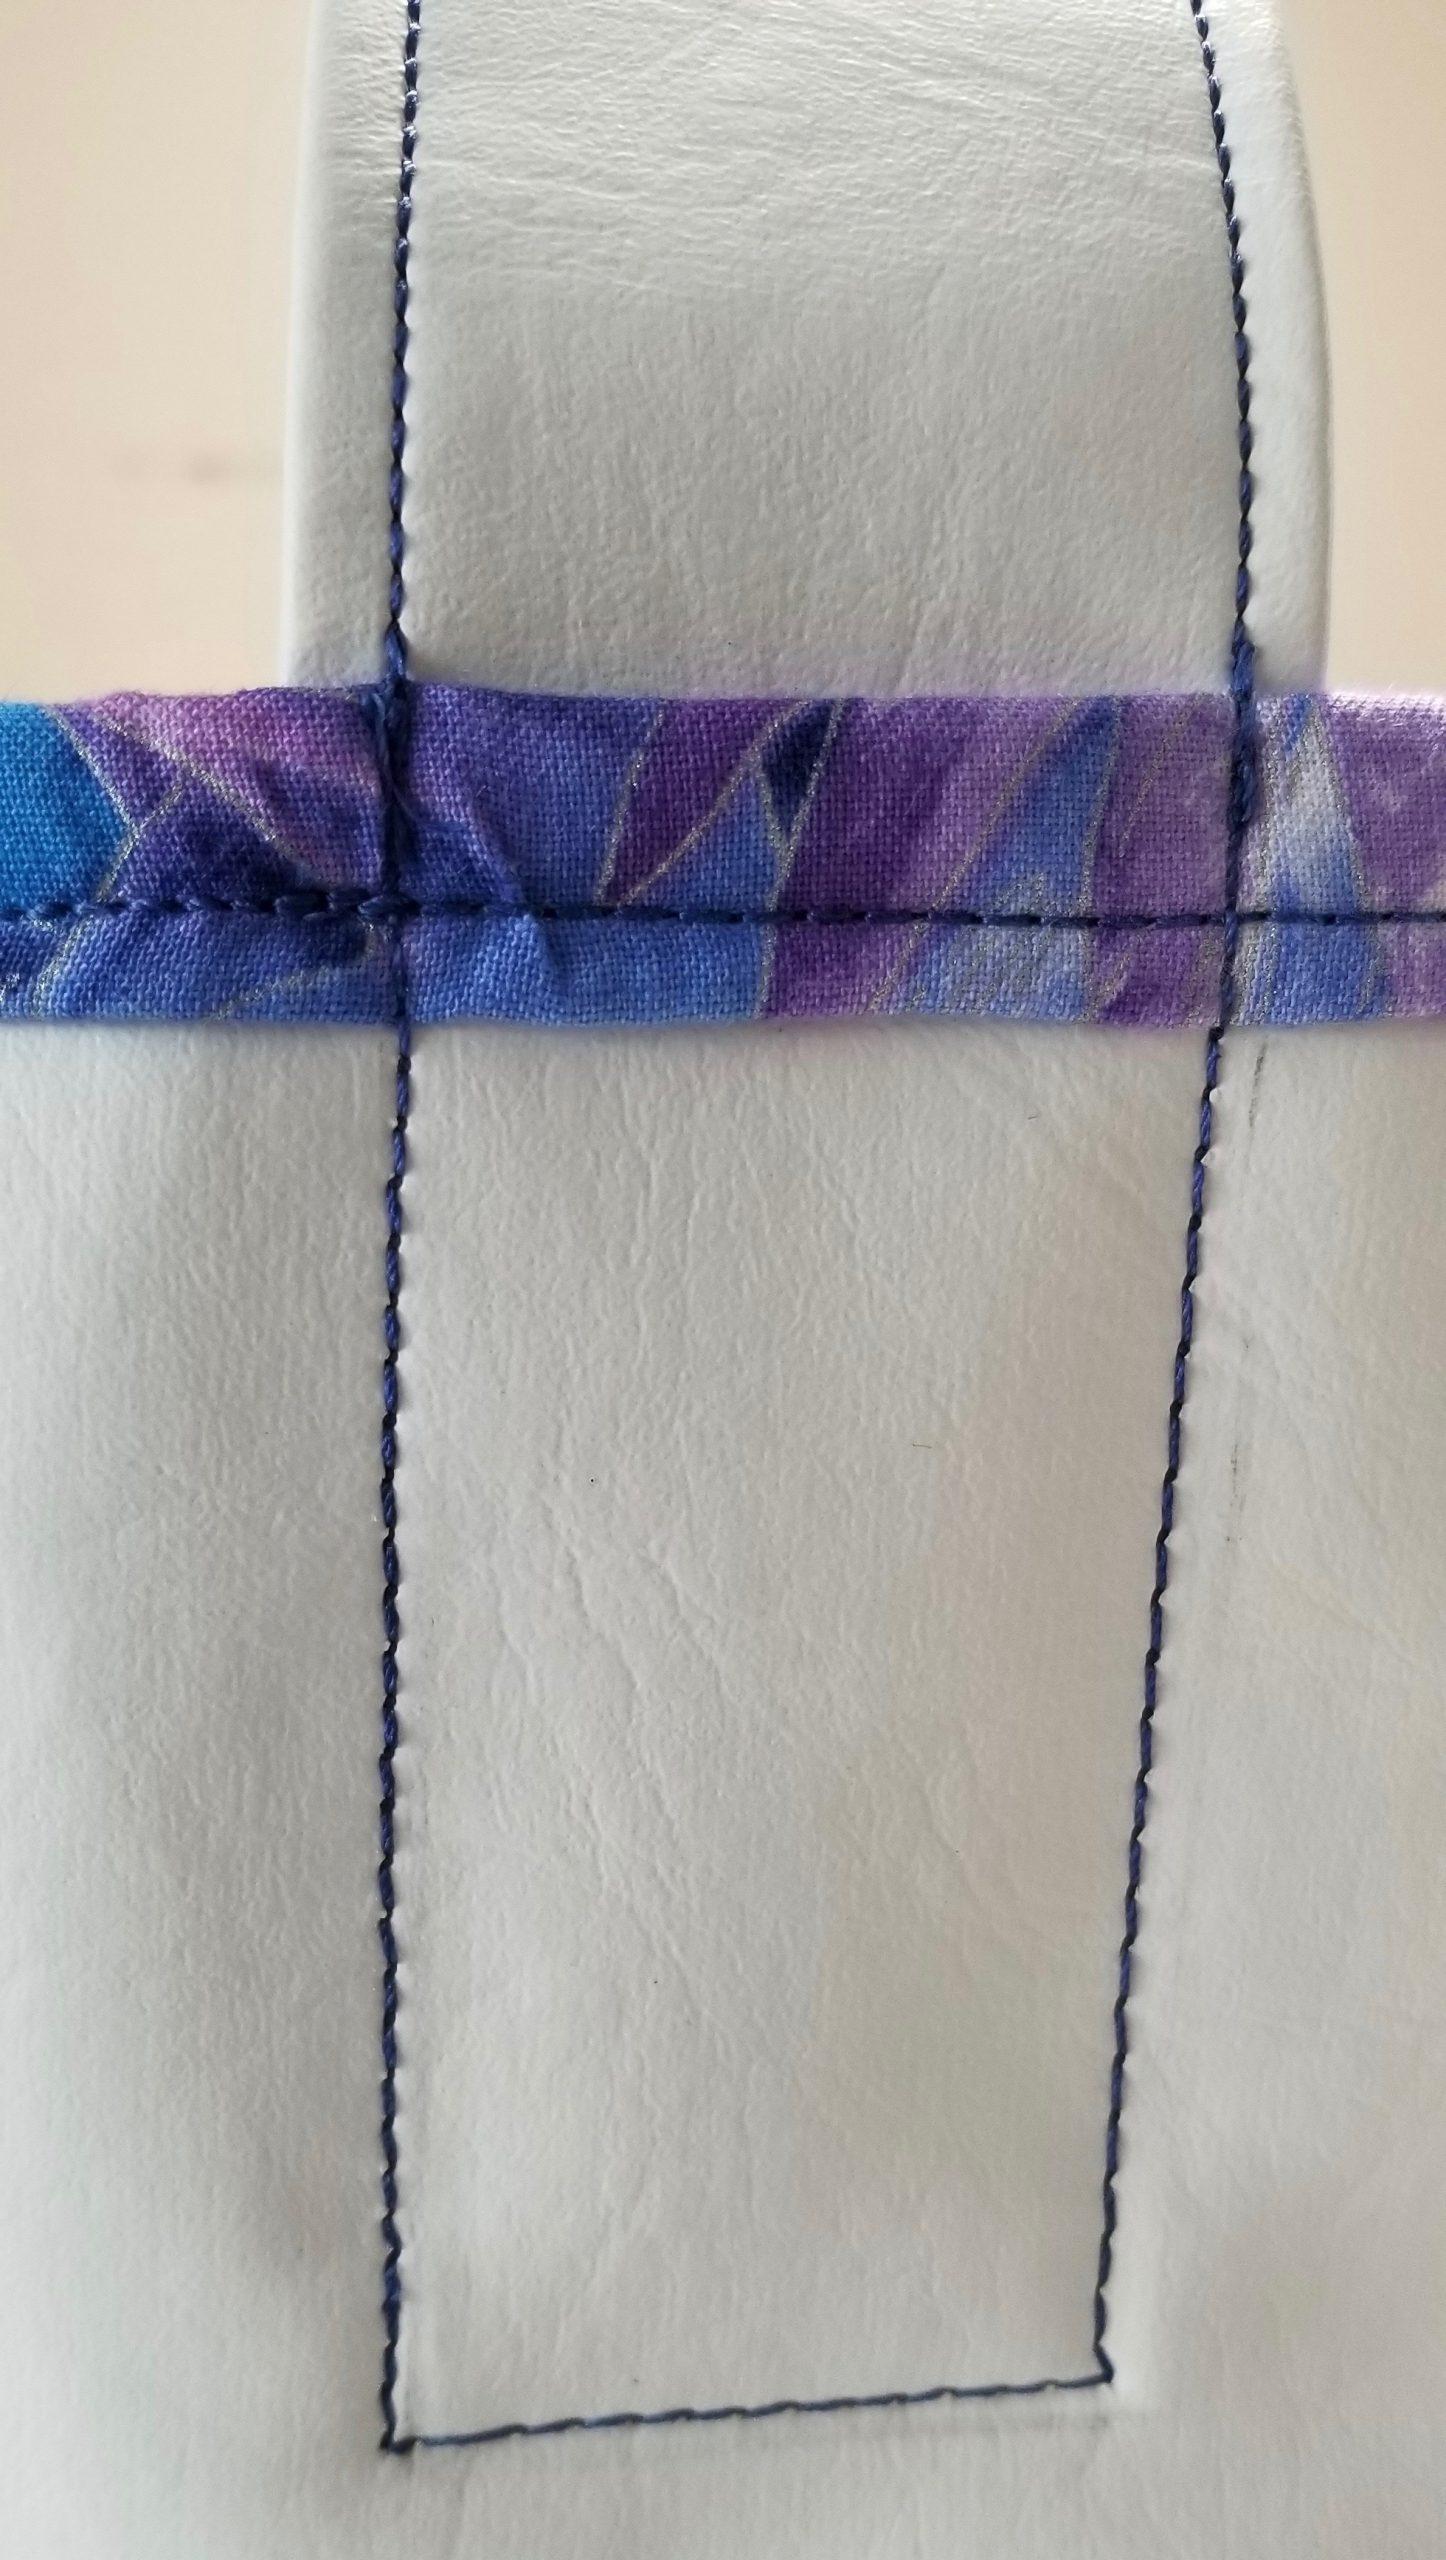
Sew around the entire top cuff, sewing over the handles at each side.
From the inside, follow your line of stitching on the strap along the sides and across the bottom. Back-stitch at the top where the handle meets the cuff of the bag. You can choose to match the thread to the color of your bag or strap. As you can see, I used a dark blue thread for both the inside and outside threads.


Step 8 – Completing the Straps
For connecting the straps at the top, you can use different methods. I had some nice Kamsnaps that matched really well, so I used them. Alternatively, you can choose to make one long strap, or stitch them together at the top adding a ribbon or bow. You could use Velcro or a hook and eye. Up to you and how you want it to look.
Step 9 – Sew the Lining Gap
As a final step, you will need to close the gap at the back of the lining that you used to turn the basket right side out. This can be machine sewn, but a nice hand sewing with a ladder stitch and matching thread is best.
Right, so all done! What do you think?
Let me know if you decided to make one too!